This post is a summary of the work that has been completed during the GSoC 2020 period for my project, Object Tracking. The project consisted of implementing an Object Tracking UI in Pitivi and the associated tracking functionality in GStreamer.
cvtracker GStreamer element
I began by adding the opencv_contrib module to the opencv installation for the Pitivi development environment. opencv_contrib contains the library with the tracking algorithms.
OpenCV Tracker Element for Object Tracking
This merge request introduces the tracking functionality in the gst-plugins-bad package.
Previously the opencv plugin was not being built due to the unavailability of the headers. This patch fixes the problem, ensuring that the headers are detected for the correct version of opencv and the plugin is built.
In the next commit: opencv: add cvtracker plugin, I implement the cvtracker element as part of the opencv GStreamer plugin and set up the associated tests to ensure correct working. The next commit: meson: add opencv/tracking header requirement ensures that the tracking library is available before building the plugin.
I implemented an additional feature to draw a rectangle over the tracked object. This will come in handy during the testing phase and for live tracking in Pitivi. opencv: cvtracker: add draw property
A brief explanation of the cvtracker element can be found on my blog post: cvtracker: OpenCV object tracking plugin
Tracker Perspective
With the GStreamer element for tracking completed, the next stage was to implement a user-friendly UI for object tracking. The new Tracker Perspective replaces Pitivi’s main window, allowing to select an object on the viewer and track it. If the chosen tracking algorithm fails to track the object correctly, the tracking can be redone from a corrected position.
The work done on the Pitivi side currently resides in the Merge Request
A brief explanation of tracking objects can be found on my blog post:
As the project progressed, we iterated and made a lot of UI improvements. A demo with the explanation can be found here: Pitivi: Edit Object Tracking
![]()
![]()
Processing the tracked objects
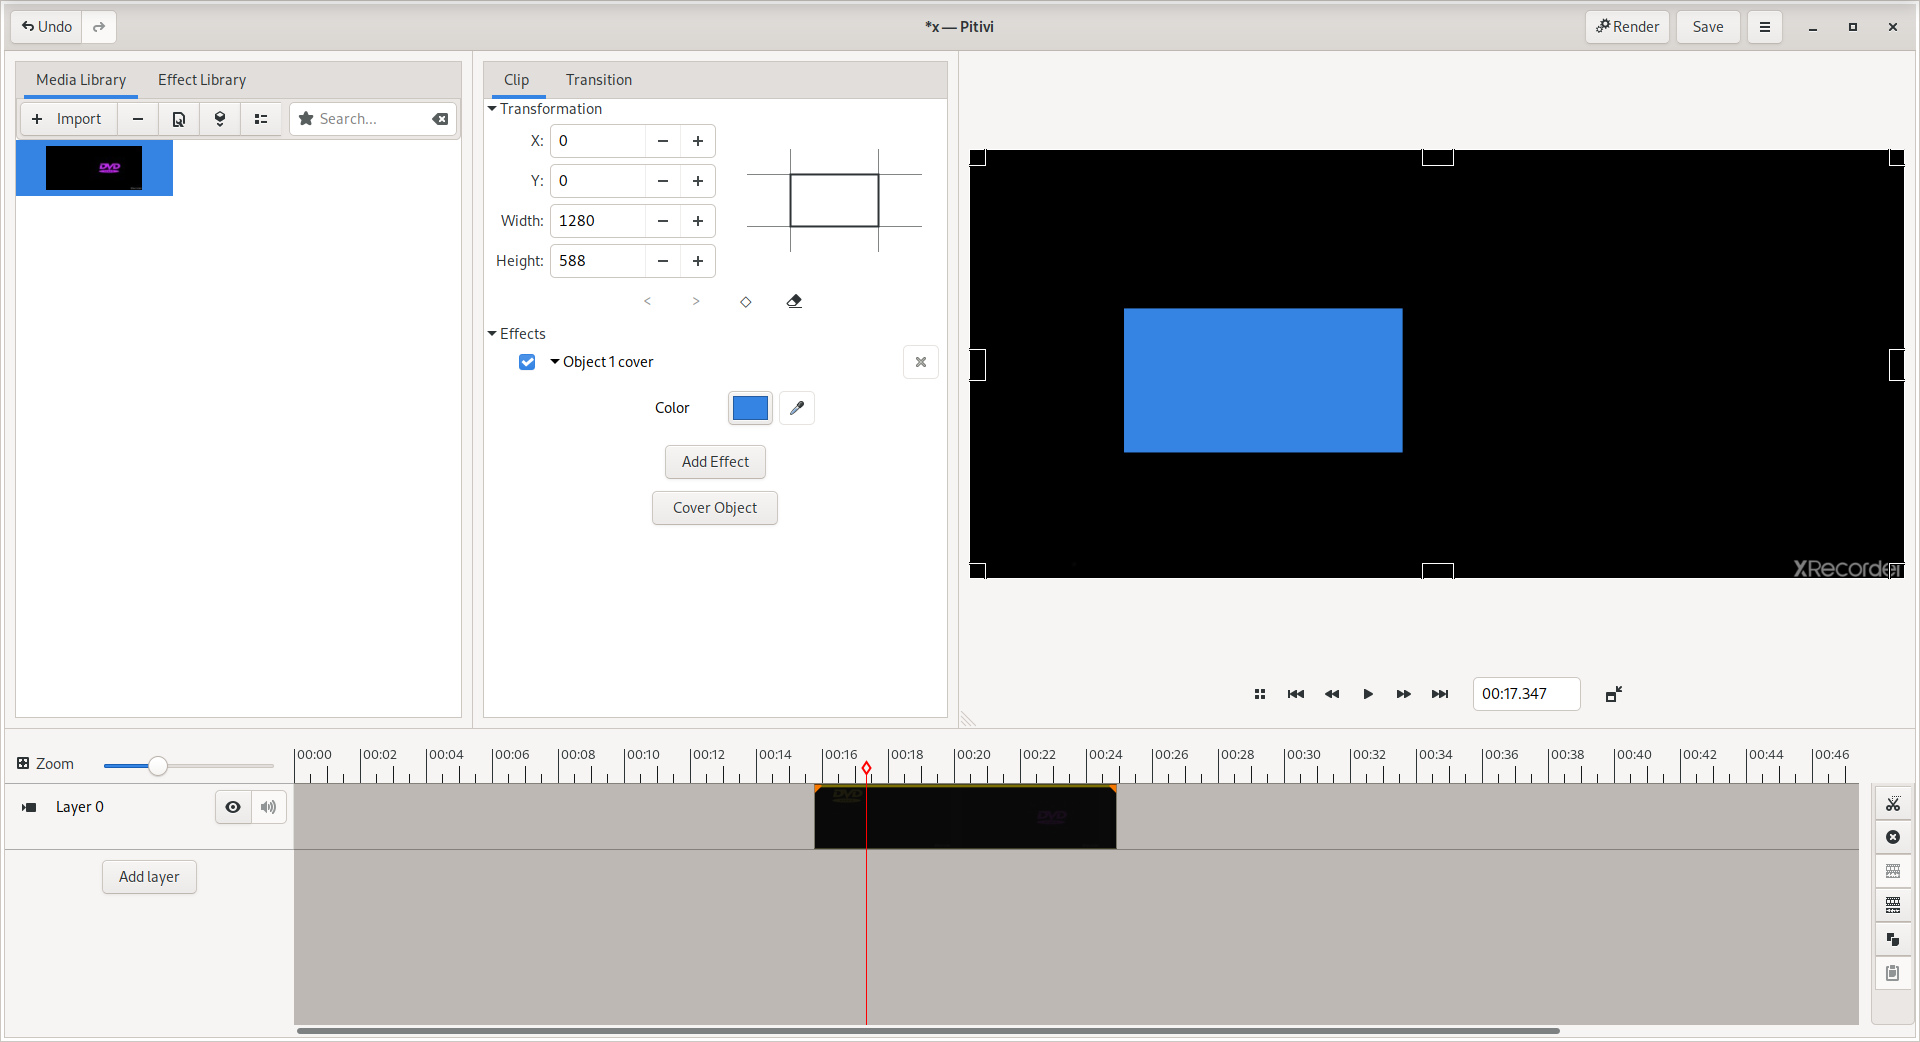
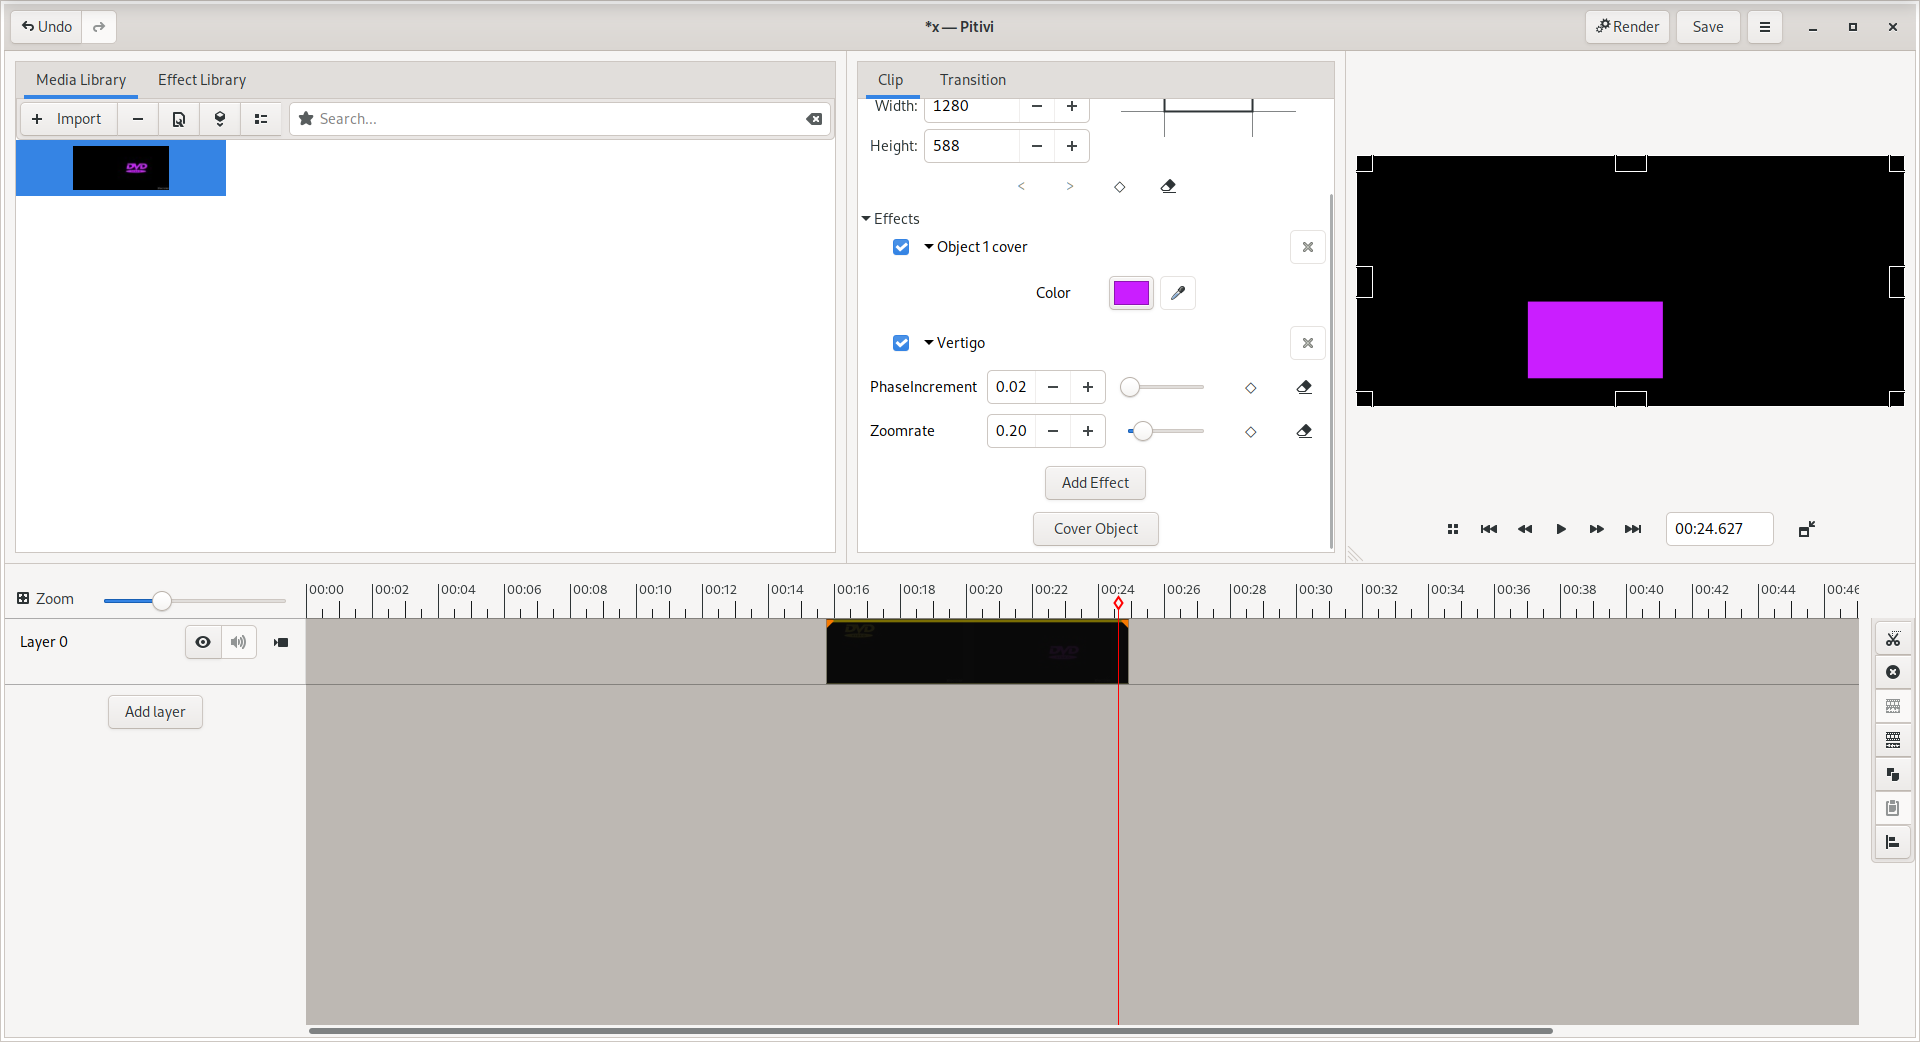
A tracked object can be covered with a colored rectangle on a clip in the timeline. This can be done easily through the “Cover Object” button in the “Clip Properties” middle pane shown when a clip is selected.
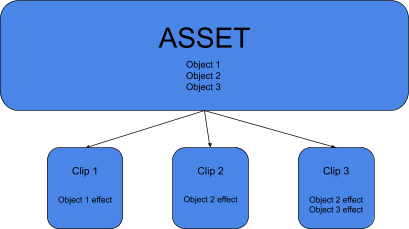
When an Asset from the Media Library is dragged and dropped on the timeline, it becomes a Clip. A user can create multiple Clips from a single Asset.
The tracked objects belong to the Asset. That means if an object is tracked, it’s available to all the Clips backed by the particular Asset. The tracked data is then applied to the properties of an Effect applied to the Clip to obtain the ‘cover rectangle’. Clips can have object effects independent of each other.
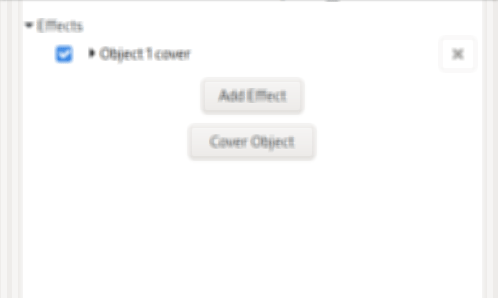
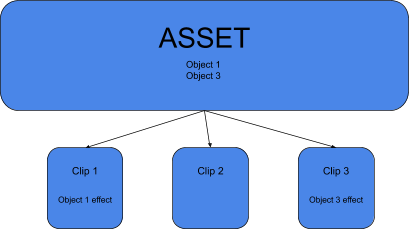
If a tracked object is deleted from the Assed in the TrackerPerspective, the effects associated with that object will be deleted from all the Clips of that Asset. The below figure shows the situation when ‘Object 2’ is deleted.
Technical Note: Taking advantage of Assets being MetaContainers, we store the Objects’s tracking data as a pitivi::tracker_data metadata item. The tracking data is saved in the Project’s .xges file by GES when the Project is saved.
Project Status
The tracker element and Pitivi UI are complete, as demonstrated in my blog posts. However, there are 2 major bugs in the feature for adding effects to the tracked objects.
The first bug is when the user adds the effect for two objects, one with more tracking data than the other, the video track of the clip gets disfigured. This might be due to no available tracking data before the start, which causes the tracking box (red box in this case) to be shown at the bottom-right corner until it receives its first tracking data point. Here’s a small demo of the bug: YouTube
The fix for this bug is to add a zorder property to the gescompositor element of the effect and to set the tracking data point to some random far away point before the beginning of the actual tracked data points.
The second bug is when the user adds the effect for an object and then resizes the clip in the viewer, the effect doesn’t follow. Here’s a demo for the bug: YouTube
The currently discussed solution is to re-adjust the tracking data every time the user makes a change to the clip video track in the viewer, by resetting the ControlSource.